
Let’s talk about the pushup — one of the simplest (but toughest!) bodyweight exercises out there. And lately, pushups have been having a moment.
When Dr. Vonda Wright appeared on a Mel Robbins podcast episode and said women should be able to do 11 pushups on their toes, it set off a viral wave on social media. Suddenly, “11 pushups” became the new fitness challenge — with everyone testing their strength.
But here’s the truth: that number? It’s just a number. What really matters is building your strength, in a way that works for your body and your journey.
Pushups are a powerful, functional move that builds muscle in your chest, shoulders, arms, and core — no equipment needed. And the best part? You can do them anywhere – in your living room, at the park, or while traveling.
But here’s the deal: most of us don’t start off being able to bang out perfect pushups on our toes. And that’s not a failure! That’s just normal. Strength takes time to build, and the best way to get there is with smart, progressive training.
Let’s break it down with a few variations to help you work your way up to full pushups.
Progressing to Pushups
While you may be familiar with standard pushups, there are many variations that may help you get started, progress, or increase difficulty.
Try doing sets of 2 or 3. Then move to 5-10 in a row. Take breaks if needed. Remember what I say, “Strive for progress, not perfection.”
Performing fewer pushups with correct form will be better over time than completing many with incorrect form. Also remember my saying, “There is no shame in the modify game”.
You are better off with a FULL range of motion and on your knees than a pushup on your toes where you barely bend your elbows. Half range of motion = half the results.
Start Here: Pushup Variations for Beginners (With Step-By-Step Instructions)
Follow these steps to progress your push ups, starting from wherever you are now!
1. Wall Pushups
A great entry point if you’re brand new to pushups or easing back in after injury.
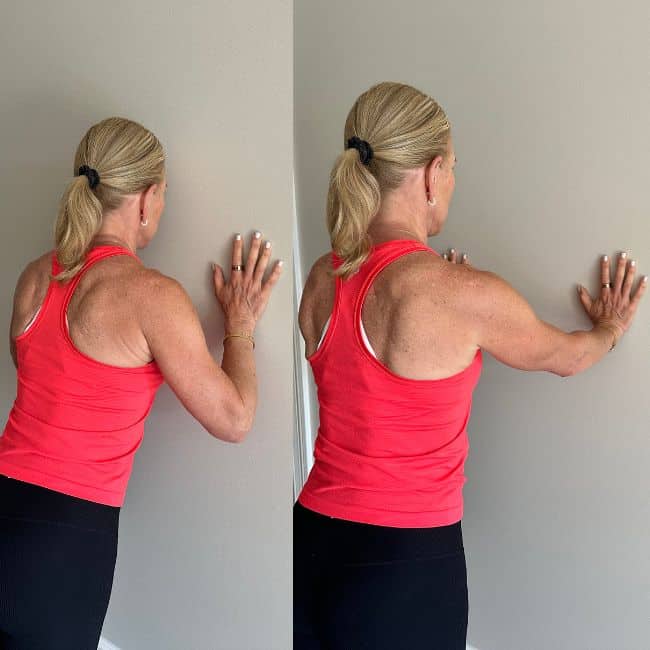
How to do wall push ups:
- Stand an arm’s length from a wall, feet hip-width apart.
- Place your hands on the wall at shoulder height, slightly wider than your shoulders.
- Engage your core and keep your body in a straight line from head to heels.
- Slowly bend your elbows and bring your chest toward the wall, keeping your heels flat on the ground.
- Exhale and push back to your starting position.
Tip: Don’t arch your back. Stay controlled and tight through the core.
2. Incline Pushups
A great middle-ground move that builds strength while reducing the intensity.
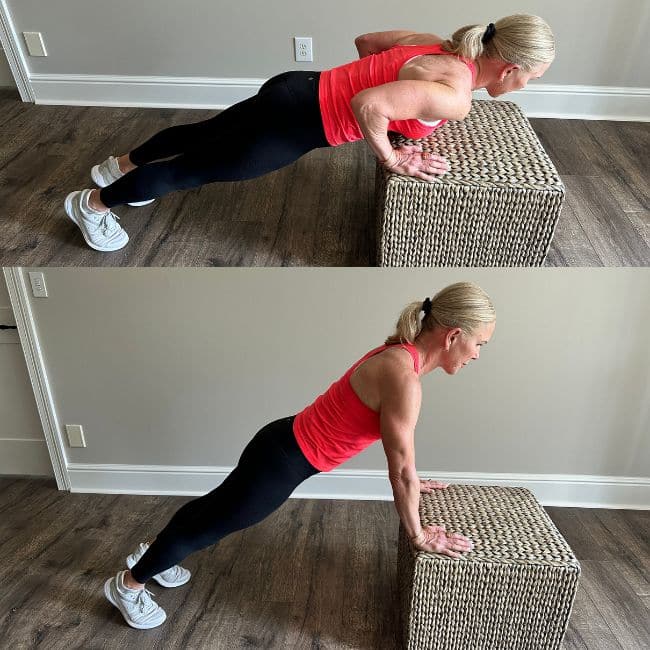
How to do incline push ups:
- Place your hands on a sturdy surface like a bench, table, or counter -shoulder-width apart.
- Walk your feet back until your body forms a straight line from shoulders to heels.
- Inhale as you bend your elbows to lower your chest toward the edge.
- Exhale and push through your palms to return to the starting position. Keep your core tight and avoid letting your hips sag or pike.
Tip: Start at a higher incline and as you progress, lower the surface you use to get stronger.
3. Kneeling Pushups
This is where real progress happens. Focus on control, not speed.
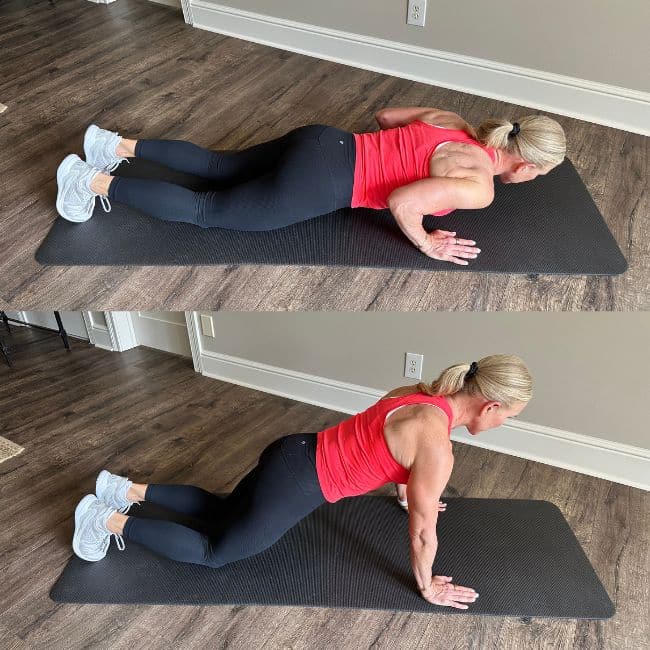
How to do kneeling push ups:
- Start on all fours, then walk your knees back a few inches so they’re behind your hips.
- Place your hands just outside your shoulders, keeping your elbows slightly tucked.
- Engage your core and squeeze your glutes to keep your body aligned.
- Lower your chest to the floor, aiming for your elbows to form a 45-degree angle (or keep them tight to your ribs for a tricep focus).
- Exhale as you push back up.
Tip: Keep your movement smooth and steady. Your chest – not your chin or hips, should be leading the way down.
5. Standard Pushups (Toes!)
Once you’ve built strength and confidence, try the full version. It’s okay to start with just a few reps.
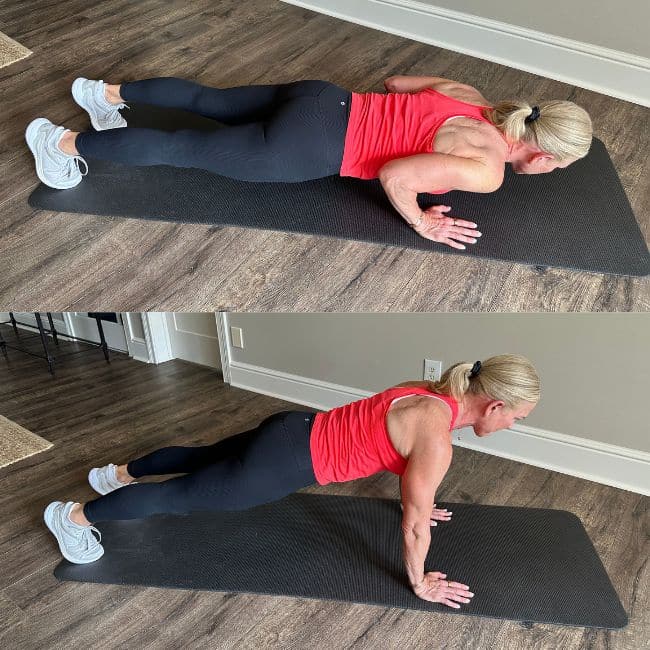
How to do standard push ups:
- Begin in a high plank: hands under shoulders, legs extended, feet hip-width apart.
- Engage your core, squeeze your legs, and maintain a straight line from head to heels.
- Inhale as you bend your elbows -either at a 45-degree angle or keep them close to your ribcage and lower your chest toward the floor. (I’m a fan of the tricep pushups lie I explain below.)
- Pause briefly at the bottom, then exhale and push back up.
Tip: Don’t rush! Fewer reps with full range and great form are better than fast, sloppy pushups.
Tips For Better Pushups
Good form matters more than quantity. Start strong with these tips:
- Keep your wrists stacked directly under your shoulders.
- Place your hands on dumbbells if you feel wrist discomfort, this keeps the wrists in a more neutral position and can help relieve pressure.
- Use a mat for knee support or a towel for extra comfort.
- Look down, not ahead. Keep your neck in a neutral position.
- Engage your core to protect your spine.
- Breathe with control -inhale on the way down, exhale as you push up.
- Focus on full range of motion. You need to stretch a muscle to strengthen it. Going low (with good form!) is key for building strength and seeing results.
Elbow Positioning: Narrow vs. 45 Degrees
Let’s talk about your elbow angle because yes, it matters.
You might wonder how elbow positioning can affect difficulty or joint stress. Here’s the scoop:
I’m a big fan of keeping your elbows tucked in close to your rib cage -think “narrow pushup” or “tricep pushup.” This style engages the triceps more, targets the chest in a slightly different way, and most importantly, puts less stress on your shoulders.
In fact, I teach nearly all my clients this variation. It’s a win-win for:
- Stronger arms
- Defined triceps
- Happier shoulders
Try to think about brushing your upper arms along your sides as you lower down – it may feel harder, but it’s worth it for the strength and joint protection you’ll gain.
Mindset Shift: Pushups Are Progress
Pushups are a skill, not a pass/fail test. Even if you’re starting at wall pushups, you’re still doing the work and that’s what matters most. Every version is strengthening your body and building the foundation for what’s next.
And remember – strength training (including bodyweight moves like pushups) is especially important for women as we age. Muscle is the magic for metabolism, bone density, hormone balance, and functional independence. Explore my favorite strength training moves for women over 50 to get started!
So if pushups feel tough today? That’s a good sign. It means you’re challenging your body and growing stronger. Stick with it. You’ll be surprised what your body can do with consistency! And you’ll feel PROUD!